Wedding

No matter how much you plan to do yourselves or how crafty your friends are, you’ll need professional help to pull off an event of this size and importance. Your vendors will be responsible for bringing your wedding visions to life; choosing a team you’re comfortable working with will make the next several months a lot less stressful.


Finding your wedding pros

If you’re hiring a planner, they will definitely be able to connect you with their favorite trusted vendors, but even so, you still want to do your own research and make an informed decision about the people who will be arranging your centerpieces, decorating your cake and playing the music. Whether you’re looking for a florist, DJ, stationer or caterer, word of mouth is still the number-one way to get reliable recommendations. Start your search by asking any of your recently married friends or coworkers for suggestions. (Be sure to also ask if they had any negative experiences, so you’ll know whom to avoid!)

Once you’ve compiled a list of potential candidates, visit their websites to get a better feel for the quality and style of their work. Browse through their portfolio of photos, look for any awards or professional distinctions they’ve received and read any testimonials they’ve posted. Of course, vendors are going to leave off negative press. To vet each vendor further, consult your local Better Business Bureau to find out if any consumer complaints have been filed against them.


Interviewing candidates

Now that you’ve got a better idea of interesting vendors, it’s time to get up close and personal by setting up interviews. You should aim to speak with at least three vendors in every category before making your final decision. (When you call to set up the appointment, to save time, you may want to confirm that the vendor is available on your wedding date, as well as ask about their average fees to make sure they fall within your price range.) Since you’ll be working very closely with your vendors over the next several months and trusting them with the key elements of your incredibly special day, it’s essential to do an in-person interview. That way, you can see if your personalities jibe. Each vendor will have plenty of questions to ask you in an effort to determine your direction, but you should come prepared with your own list of questions related to your specific needs (for example: has the vendor ever worked in a barnyard setting? are they familiar with gluten-free recipes?), as well as more general details (will the vendor be there on your wedding day, or do they send a team member?). Before you wrap up, always ask for references (with whom you should actually follow up) and never ever feel pressured to hire anyone on the spot. Even if you fall in love with a particular vendor after the initial interview, stick to the original plan to meet with at least two other candidates (at the very least to reaffirm your decision).

Comparing the competitors

While you don’t want to wait too long (top vendors get booked up to a year or more in advance), give yourself a few days after all your interviews to compare prices, overall impressions and any notes you made about each vendor. Highlight the pros and cons of each and prioritize what’s most important to you. Once you’ve narrowed it down to a short list of potential vendors in each category who suit your budget, taste, personality and timetable, ask them to give you a written proposal outlining the services they’ll provide, the vision they’ve sketched out based on your conversations and a breakdown of the estimated costs to pull it all off. Then sit down and carefully compare the details of potential vendors’ proposals.

Negotiating the contract

When you’ve determined your top picks, you’ll set up a meeting to finalize all the nitty-gritty details and sign a written agreement that spells everything out in easy-to-understand language. While there will be aspects of your wedding that you won’t be able to control (like the weather), contracts are your number-one insurance plan against something going wrong, and they can help ensure you get exactly what you paid for — from the right color of peonies to a limo driver who arrives on time. Contracts are legally binding, so if your vendor fails to do what’s stipulated in yours, you can take them to court to recover your payment. Likewise, if you don’t hold up your end of the deal, they can do the same.

Bottom line: Do not work with any vendor who refuses to provide or sign a contract. Even if you’re working with a friend or a relative, you’ll still want to put together some form of written agreement.

The basic points that should be in all of your vendor contracts include dates and times of services, the names of all parties involved in the agreement, the deposit and final payment amounts (as well as the payment schedule), and the cancellation and refund policies. Vendors ultimately want your business, so it doesn’t hurt to ask (nicely) if they can throw in any perks or reduce their fee if a vendor or detail you love is outside your budget. Keep in mind that they won’t always be able to come down, but in our experience, most wedding vendors will do their best to work with you. Contracts should be as specific as possible, listing particular colors, types, quantities (number of guests to be served, individual flowers to be used in each centerpiece) and even substitutions (for example, if pink peonies aren’t available, then pink garden roses will be used instead). They should also include a day-of emergency contingency plan (if photographer A is unable to shoot the wedding because of an emergency, photographer B will replace them). A detailed description of the services provided and final product you’ve agreed upon should be included as well.

Before you sign on that dotted line, have an expert eye (your detail-oriented aunt, a lawyer friend or, even better, your wedding planner) look over each contract to make sure it’s accurate, clear and complete. If you have questions, go back to the vendor to discuss your concerns and renegotiate the details until both parties are happy. Just make sure to ask for a clean final copy of the contract that has all of the revisions you requested, including any changes that were discussed via phone or email. Once you’re 100 percent comfortable with the terms, you and the vendor should both sign and date two copies (one for each of you) to make your agreement legally binding. File the contracts in a safe place along with any related emails or receipts you can refer back to should any issues arise. And should you need to make changes — and your vendor allows it — after you’ve signed the contract, request an addendum that you and the vendor should both initial.


Locking down your team

Until you both sign that contract and you pay the deposit, vendors aren’t obligated to hold the date of your wedding. Translation: They’re free to book another wedding for that day. In order to seal the deal and ensure a vendor’s services, you’ll likely need to put down a deposit at the time you sign the contract. This is typically about 50 percent of the total bill, but it can vary depending on the vendor or if you negotiate a set amount. Be aware that most deposits are nonrefundable, but again, this is a point you’ll want to settle with the vendor up front. Some are willing to return your deposit for special circumstances like loss of a job, illness or military deployment. Whatever you do, just get all those details written into your contract — and never pay a single dime until that signed contract is in your hand! It’s also a smart idea to pay using a credit card. That way, if the vendor goes out of business, ruins your cake or fails to show up, you may be able to have the charges reversed.

Working with your vendors

Got everyone on board? Congrats! With your team finally assembled, it’s time to get down to the exciting business of planning. As you jump right in, remember that your vendors are there to help you, and they truly want you to be happy. The secret to a successful vendor/bride relationship is honest communication.

The best way to get exactly what you’re envisioning is to show (not just tell) your team what you want. Words like “modern,” “classic” or “elegant” are largely subjective and can be interpreted in many different ways. Don’t expect your vendor to magically re-create something from your imagination when you haven’t given them concrete examples to work from. For visual items, like the flowers, cake or lighting, have pictures you can refer to on hand at all of your appointments. For the DJ or band, make explicit lists of songs you want — and don’t want — played.

Never hesitate to speak your mind if you’re not satisfied with an idea your vendor presents to you. Your feedback — both positive and negative — is an essential tool that will help the vendor get to the root of exactly what you want. We promise, as professionals, they’re used to criticism, changes and nitpicky clients, and they won’t be upset or offended. In fact, they’ll be genuinely grateful for the feedback, and you’ll be happy you gave it when you see the final results.

Flowers are one of the most beautiful and visually appealing part of any wedding. From bouquets to centerpieces and beyond, they bring a sense of style, scent and sophistication to a theme and color scheme. That said, they can be tricks to pull off. So with this in mind, we’ve compiled a handy list of dos and don’ts to help you plan a blooming celebration!

DO…

Give your florist a colour palette to work with, rather than insisting on specific flowers. This will allow them to create a stunning design that falls within your budget, since they know how to work around factors such as the time of year and the season, both of which play a key role in the availability, and thus price, of certain blooms.

DON’T…

Use floral displays to cover up less polished-looking parts of the venue, such as the fire exit. All you’ll really do is make sure they draw the eye of your guests. Instead, use your flowers to draw attention to the breathtaking parts of the room, such as the tables, the cake or even the dance floor.

DO…

Make sure your bouquet is manageable. Larger bouquets look absolutely stunning in photos, but so do smaller ones. So be realistic about your capabilities. If you don’t have the upper arm strength to go heavy, go petite, and remember – all eyes will be on you anyway.

DON’T…

DIY your flowers if you can help it. Thinking practically, your blooms will need to be purchased and arranged the morning of the big day, which is a big job all on its own. And honestly, it’s the last thing you need to be worried about when there’s thing like hair and make-up going on. So leave it to a pro and focus on getting ready yourself.

DO…

Incorporate non-floral elements in your ceremony and reception displays. Everything from your bouquets to your reception table centrepieces can be jazzed up with non-floral elements such as lights, candles, jewellery, candy and even grasses. Alternatively, use your flowers in unexpected ways, such as to decorate a gorgeous getaway car.


DON’T…

Choose flowers that are sensitive to heat if you are having a summer wedding. We all know how warm Aussie days can get, and there’s a chance they will start to wilt and lose appeal before your ceremony is even over.

DO…

Invite your florist – if they’re not already familiar with them – to make a personal inspection of your wedding venues. This will give them a better idea of what you need to bring your vision to life and will greatly aid their creative process by giving a sense of scope, dimension, ceiling heights and more.

DON’T…

Choose flowers with a strong perfume for your table centerpieces as the scent will overpower your food. And with the care – and dollars! – that went into picking your menu, you don’t want attention turning anywhere else.

DO…

Tell your florist if there are any particular flowers that mean something to you. For example, if your dad grew roses or your grandmother wore gardenia scent, they may be able to incorporate them in your blooms for a lovely sentimental tribute.

DON’T…

Be obvious. Brides can sometimes feel hemmed in by tradition and the need to go with what’s in fashion or on trend. But it’s better to think outside the box and ask for what you really want, rather than what you think you should want. Remember the golden rule of wedding planning – it’s your day so plan it your way.

Settling on an overarching concept and sticking to it is crucial for a wedding that feels unified and looks like you—and trust us, it will make your life a lot easier as you weed through all the options in the weeks and months to come. So, before you try on a single gown, book your band or sample a bite of cake, look at the big picture and determine the style and vibe you want to set on your wedding day.

Step 1. Think Big

The beginning of the process is the dreaming phase—don’t worry about how something will work or how much it will cost. Don’t even consider what your mother will think. Picture your dream wedding.

What do you see? Here are a couple of questions to consider while everything is coming together in your head.

  • Big (everyone you know) or small (close friends and relatives)?
  • Outdoors or indoors?
  • Home (one of your hometowns or your current city) or away (hello, destination wedding!)?
  • Modern, classic, romantic, vintage, rustic or all-out glam?
  • Fancy, casual or somewhere in between?
  • Spring, summer, winter or fall?

Step 2. Gather and Save Inspiration

To get a better idea of what you want (and definitely don’t want), spend some time checking out bridal magazines, books, blogs and real wedding photos. But don’t limit yourself to browsing just the obvious sources—something as unlikely as a wallpaper pattern or a pretty perfume package design can spark an idea. Fabrics, color chips, stationery and trinkets are all great starting points too. Collect your ideas on an inspiration board—it’s one of the best ways to keep everything organized. It will also help you identify common threads and visualize how various elements will look together.

Step 3. Figure Out the Formality

How fancy or casual do you want to go? Do you want to see your guests all dressed up at a sit-down dinner? Or will it be more casual with informal seating and stations? The setting of your wedding can also dictate the vision — a beach wedding calls for a more laid-back vibe, while a ballroom may require a more classic and elegant wedding. And don’t forget about your own personal styles and the kind of atmosphere that best speaks to you two as a couple. Do you like hosting intimate dinner parties, getting decked out and partying until dawn, or throwing a low-key poolside picnic? Whatever you decide, you’ll want to carry your chosen formality through every aspect of your wedding, from the stationery to the parting favor.

Step 4. Narrow in on Your Style

The more specific you get with your vision, the easier it will be for you to choose your details and convey your ideas to your pros — the tighter your theme, the better. Instead of stopping at “glam,” decide whether you want art-deco glam or old-Hollywood glam. Your theme can be anything from a favorite era, hobby or place to your heritage or culture. To help shape the style, think of interesting hobbies you and your fiancé have in common. Maybe you both love golf or share an appreciation of art. Or perhaps there’s a place you two hold dear, like the mountaintop where you got engaged or the vacation locale where you fell in love.

A word of caution: Don’t load up on too many ideas. It’s great if you love Broadway musicals and your spouse-to-be is into drag racing, but trying to combine both on your wedding day will likely lead to a weird, disjointed affair. Do your best to compromise on one concept and stick to it.

Step 5. Pick Your Colors

Color is a unifying factor between all your wedding elements, from the invitations to your bridesmaid dresses. Take a look at a color wheel to determine which shades you’re drawn to. The easiest way to make all of your wedding elements come together is to stick with one main color and an accent color, or two equally prominent complementary colors (colors that are directly opposite each other on the color wheel, like green and pink or yellow and purple) for a bright contrast. But don’t feel limited to just two colors — adding neutral or metallic accents will make your palette robust. You could also choose an analogous scheme — putting together three colors that fall side by side on the color wheel, like blue, periwinkle and violet, to bring out the subtle nuances of one color family.

Step 6. Master the Motif

A motif is the last flourish that can tie together the overall look of your wedding—it can show up anywhere from the invitation to the cake. It’s typically a pattern, shape or insignia that conveys your style (think: monogram, family crest, toile pattern or leaf icon). Whatever you choose should reinforce the mood you’re trying to create. Use your motif sparingly—three or four places max. Any more than that will feel forced or look too matchy-matchy.

Step 7. Don’t Forget the Vibe

As you’re planning, remember that the theme obviously affects the look of your wedding, but it can also set the tone. An evening wedding in a gilded ballroom meant to conjure the Roaring ’20s will ramp the chic quotient up a notch, while a clambake on the beach will have guests kicking off their shoes and enjoying a beer right out of the bottle. Either is great, as long as it feels right to you. You want your personalities and passions to shine through, which is what ultimately makes your wedding stand out and feel special.


When planning your wedding, there are things that are nice to know, like that mermaid silhouettes are all the rage or that purple is making a comeback. Then, there are things you need to know — advice so essential that any bride who’s lucky enough to hear it thinks, “I’m so glad someone told me that!” If you’re wondering whether there’s something you may have missed (or even if you’ve got everything under control), check out our indispensable planning secrets.

1. Guests Come First

Get a grip on the approximate number of guests you’ll invite before settling on a venue. This will ensure there’s ample space for your crew. As a rule of thumb, allow for 25 to 30 square feet per guest. That may seem like a lot, but it’s not if you count the space you’ll need for the tables, bustling waiters, the band, and the dance floor.

2. Investigate Wedding Blackout Dates

Know ahead of time if your wedding date falls on the same day as a trade conference, charity walk, or other local event that could affect traffic and hotel room availability.

3. Listen to Mother Nature

Heed the weather and other potential annoyances. Guests have been known to skip out early from hotter-than-hot summer tent weddings and improperly heated winter loft receptions. Bugs (gnats, deerflies, and no-see-ums) also swarm in certain areas during certain seasons. Consider renting pest control tanks to alleviate the problem or including bug repellent in guests’ gift bags. And if you want a sunset ceremony, make sure you know when to say your vows by checking SunriseSunset.com.

4. Check Your Credit

Take advantage of the high cost of weddings and sign up for a credit card with a rewards program. Whether it gives you airline miles or great shopping deals, consolidating all wedding-related purchases to this card will help you accumulate thousands of rewards points (which could be used for your honeymoon).

5. Pay It Forward

Let one vendor lead you to another. Your wedding photographer can tell you which florist’s blooms really pop, and your reception manager should know which band packs the dance floor.

6. Lighten Your List

The easiest way to trim your wedding budget? Cut your guest list. Remember, half of your wedding expenses go to wining and dining your guests. If it’s costing you $100 per person, eliminating one table of 10 can save you $1,000.

7. Ask and You Might Receive

Request an extra hour for cocktails or for your band to throw in that Frank Sinatra sound-alike before you sign on the dotted line. Most vendors would rather secure the reservation than nickel-and-dime you early on and turn you off. Later on, though, they may have less of a motive to meet you halfway.

8. Make a Meal Plan

Another unforeseen expense? Feeding your wedding day crew. Before you sign the contracts, make sure you’re not required to serve the same meal to your vendors that guests will receive. Otherwise, you could be paying for 20 additional lobster tails. Choose a less expensive (but equally hearty) meal for them instead. You will have to let your wedding caterer know a couple of days before the wedding exactly how many vendors you need to feed (don’t forget photography assistants and band roadies) and what you want them to serve.

9. Get Organizationally Focused

In a three-ring binder, compile all your correspondences with vendors, notes you make during meetings, and photos or tear sheets from magazines you want vendors to see. Set up a special email address dedicated to your wedding, and store important vendor numbers in your cell phone.

10. Tend to Your Bar

Typically, you need one bartender per 50 guests to keep the line at a minimum. But if you’re serving a signature cocktail that cannot be made ahead of time (or in large quantities), consider adding an extra server designated to this task.

11. Leave Some Room in Your Wallet

Your wedding budget should follow this formula: 48 to 50 percent of total budget to reception; 8 to 10 percent for flowers; 8 to 10 percent for attire; 8 to 10 percent for entertainment/music; 10 to 12 percent for photo/video; 2 to 3 percent for invites; 2 to 3 percent for gifts; and 8 percent for miscellaneous items like a wedding coordinator. It’s essential to allocate an extra 5 to 10 percent of your money for surprise expenses like printing extra invites because of mistakes, additional tailoring needs, umbrellas for a rainy day, and ribbons for the wedding programs. Go to TheKnot.com/budgeter for an interactive budget allows you to add your own items.

12. Don’t Be Afraid to Ask

Your wedding vendors should be your go-to, most-trusted experts during the planning process. When working with them, you should feel free to really explore what it is you want — maybe it’s serving a late-night snack instead of a first course or doing a bridal portrait session rather than an engagement session. The bottom line is that you should feel like you can have an honest conversation with them about what it is you want. Their job will be to tell you what you can and can’t make work given your wedding budget.

13. Wait for a Date

Sometimes, last-minute planning can work in your favor. The closer your date, the more bargaining power you have. Since most people book their wedding sites at least six months in advance, calling for open dates two months prior to your desired time can save you up to 25 percent. And, Friday and Sunday weddings should cost about 30 percent less than Saturday weddings.

14. Manage the Mail

Of course you want the perfect stamps for your wedding invitations. But not all stamps are widely available at every post office, especially in large quantities. Save yourself scouting time by ordering them online at USPS.com. And be sure to weigh your invitation and all the additional paper products before you send them out so you can attach the right amount of postage. Ask your stationer about the need for additional postage for odd-shaped envelopes.

15. Prepare for Rejection

Know that as a rule, about 30 percent of the people you invite won’t attend. Naturally, this depends on the location of your wedding (destination weddings are harder to attend), how many out-of-towners are on your list, and the timing of the event (some guests may have annual holiday or summer plans). On the other hand, everyone could accept — knowing your wedding will be the can’t-miss party of the year!

16. Make a Uniform Kids Policy

You have four choices: You can welcome children with open arms; you can decide to have an “adults only” wedding; you can include immediate family only; or, you can hire a child care service to provide day care either at the reception space, in a hotel room, or in a family member’s home. To prevent hurt feelings, it’s wise to avoid allowing some families to bring children while excluding others (unless, of course, the children are in your bridal party).

17. Prioritize Your People

Pare down your guest list with the “tiers of priority” trick. Place immediate family, the bridal party, and best friends on top of the list; follow with aunts, uncles, cousins, and close friends you couldn’t imagine not being there. Under that, list your parents’ friends, neighbors, coworkers, and so on. If you need to make some cuts, start from the bottom until you reach your ideal number.

18. Take It One Step at a Time

Put together a wedding planning schedule and do things one by one, in a logical order, so you don’t take on too much too fast and end up with everything snowballing around you. Don’t hire any vendors before you’ve confirmed your date; don’t design your cake before you’ve envisioned your flowers; and don’t book a band before you’ve settled on a space.

19. No Ring, No Bring

If your guest list is bursting at the seams, assess the plus-one scenario. Do a faux seating chart in your mind, and imagine whom your single pal would sit with. If it’s a table of singles that she knows pretty well, then you’re all set. If it’s a table of couples (making her the odd one out) or if it’s a table of singles where she won’t know anyone, consider bending the rules. If asked why you’re not allowing single friends to bring guests, size constraints or your parents’ never-ending guest list are always good fallback white lies.

20. Release Rooms

As soon as you have picked a date, start to look for hotels in a wide variety of price points. Many hotels allow you to reserve rooms for guests under a special wedding block and a reduced rate. You can then release any unbooked rooms a month prior to your wedding. If the hotels you contact insist upon contracts with cancellation penalties, just say no — you don’t want to be responsible for rooms you can’t fill.

21. Provide Accurate Driving Directions

Make sure guests know where they’re going. As easy as online map programs are to use, sometimes the directions are wrong — or there’s a quicker, less traffic-prone route to take. Ask your ceremony and reception sites for printouts of recommended driving directions, which they often keep in stock for weddings and will give to you for free, and test out the routes yourself.

22. Keep a Paper Trail

Get any nonstandard changes to your agreements in writing or send the vendor a confirmation email saying, “Hello, just confirming that you’ll keep the venue open until 2 a.m. versus midnight.” Don’t take anyone on his word — by the time the big day rolls around, your contact may no longer be working there to vouch for you.

23. Schedule the Setup

You must make sure there’s ample time for setup. If you’re renting a venue and bringing in outside help, ask, “What time can people come in to set things up?” Preston Bailey, author of Preston Bailey’s Fantasy Weddings, recommends seeing if they can do it the day before, or at the very least the entire wedding day, before the event starts.

24. Learn About Marriage Licenses

You can check your state’s license requirements online, but confirm with a call to the county clerk’s office to see when they’re open. Even if it’s open from 9 a.m. to 5 p.m., they may issue marriage licenses only during slower times like, say, Thursdays from 2 p.m. to 3 p.m. Give a copy of your marriage license to your mom or your maid of honor (just in case you lose yours during the final days before your wedding).

25. Go Over Ground Rules

Be prepared! Ask the manager of the house of worship or site where you’ll be married for the list of restrictions (if any). For instance, is flash photography or bare shoulders prohibited? Or, if you’re exchanging vows outdoors, are you allowed to plant tent stakes in the lawn (which is often a no-no)?

26. Classify Your Cash

Wedding budgets are all about balance. Start your budget planning by making a list of the crucial details, like the music, your wedding gown, the invitations, the flowers, and the photographer, and assign a number to each — one being the most important and three being the least. Invest your money in all your number ones and cut corners on your number threes. (But everything can’t fall into the number one category!) For example, if a designer gown and fabulous food are what really matter, you may have to choose simple invitations and smaller floral arrangements.

27. Help Guests Pay Attention

Make sure your guests can see — and hear. If people are seated farther than 15 rows back from your ceremony altar or podium, consider renting a mic and a riser. This could range anywhere from $50 to $100, depending on the equipment used. You’ll need to coordinate the delivery and setup with your ceremony space, so put your wedding planner or best man in charge of this task.

28. Write Down Your Digits

Carry an emergency contact sheet on your wedding day. Keep the paper with names and phone numbers of all your vendors in your purse — it may come in handy in case your limo driver gets lost or you decide you’d like your photographer to take some behind-the-scenes shots.

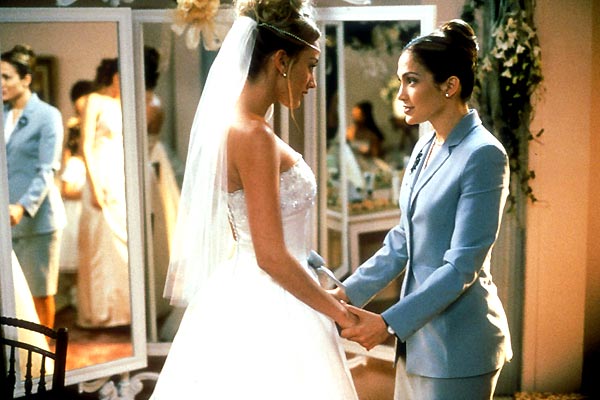
29. Call the Fashion Police

Don’t go dress shopping on your own — all the gowns will start to look the same after a while and it will be harder to recall which style you really loved. But be careful about who you do bring. If your mom or sibling can’t make the trip, ask a friend who is truly honest. This is the time when you really need to know which dress looks best.

30. Be Realistic With Your Time

When it comes down to the last month of your planning (and when you’re particularly harried) look at your mile long to-do list and cut three things. Yes, cut three things. Not crucial things that you just don’t feel like doing, such as picking a processional song or confirming final details with all of your vendors. Eliminate only the over-the-top tasks like hand-painting “Just Married” signs, or baking cookies for all of the welcome bags. Make a pledge to not think about them ever again.

1 6 7 8 9