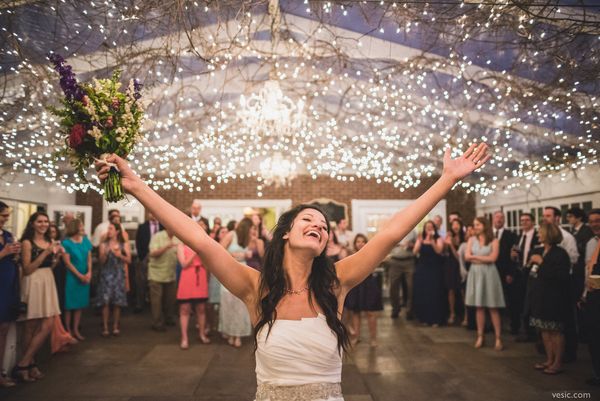
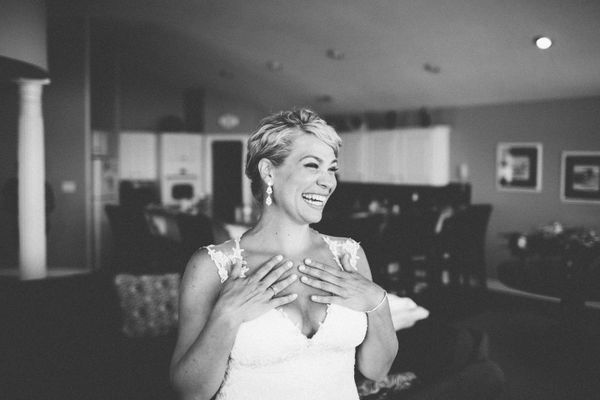
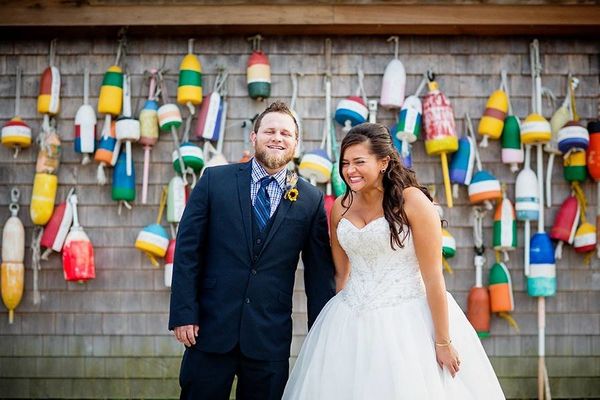
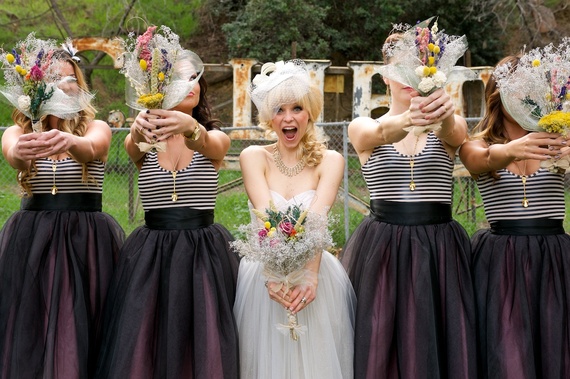
On the day of the wedding, most brides can’t help but radiate joy from every pore. Below are 15 photos of beaming brides to remind you just how good it feels to surround yourself with love.
1.
2.
3.
4.
5.
6.
7.
8.
9.
10.
11.
12.
13.
14.
15.
Comments Off on Captured Moments Where Brides Simply Couldn’t Contain Their Joy
Both the bride and groom and wedding guests can end up spending a fortune on the big day even though a winter wedding is filled with cost-saving possibilities. Below are some inspirational ways to save money in the winter wedding season.
Reception
Pick up pine cones
In the weeks leading up to the big day pick up any pine cones you see. They’re completely free and can look beautiful as a table centerpiece on their own or spray-painted silver.
Look through your garden
Gorgeous winter foliage can really set your wedding apart. Why not try streaming ivy down the aisle of the church and making Christmas wreaths for the table centerpieces.
Opt for cheaper flowers
Summer weddings often require a wide variety of color in the floral arrangements but winter weddings can be simpler. Baby’s breath is a beautiful flower that you can buy direct from the flower market for a tiny price.
Bridal party
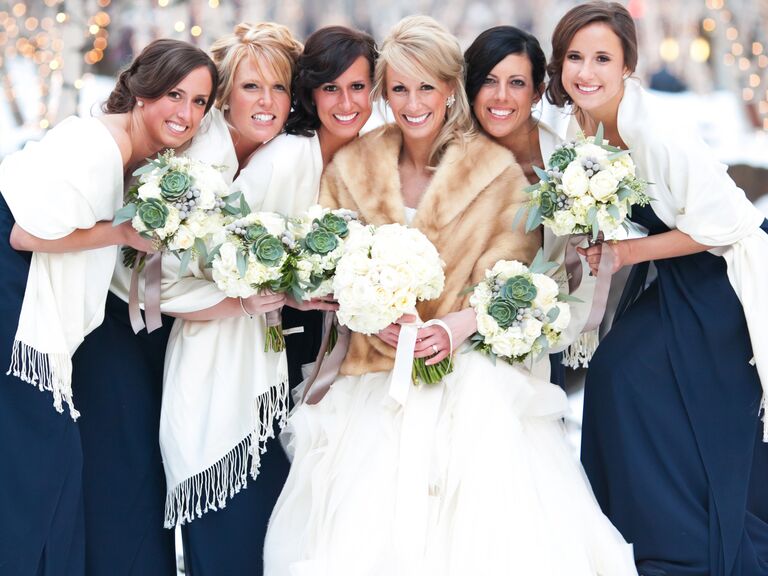
Simple bridesmaid dresses
If you choose to focus your attention on décor you can opt for a simpler look for your bridesmaids. Go for a dark, block color such as navy or charcoal to look classy and sophisticated.
Simple suits for groomsmen and ushers
The good thing about a winter wedding is you can use as many dark color as you want. Ask your groomsmen what color suits they already own and chances are they will already have, or can easily borrow, the same color. Great choices include grey and black.
Bride’s accessories
Winter weddings allow brides to be a lot more theatrical as guests tend to expect more glitz and glamour. Therefore, you can buy a cheap dress but make it look more expensive by hiring accessories such as elegant white gloves, tiaras and fake-fur stoles from a dress hire shop.
Wedding guest attire
Wear a dress you already own
In summer, repeating the same outfit more than once is tricky because you may be seeing the same people at different events throughout the season. In winter, you probably have far fewer weddings to go to so grab a dress from the summer and change around your hair, accessories and shoes.
Ask friends and family for a glamorous coat
If you’re attending a winter wedding you need to have a warm coat to wear in case you’re caught out in the cold for photos. Don’t spend a fortune on a new jacket for one day, instead ask friends and family if they have one you can borrow. Older relatives especially might have something perfect stashed away in their wardrobe.
Courtesy of: Wedding Ideas Mag
Comments Off on How to save money on your WINTER WEDDING!
Think your autumn wedding has to be all about pumpkin centerpieces and foliage hues? Not to worry — fall weddings have tons of wedding style options.
It’s easy to feel trapped in a certain kind of wedding style when you’re planning a fall wedding — you might feel bound to a wedding color palette of brick to russet to terra cotta, and that autumn leaves are a décor necessity. But it’s not so — we’ve busted the top fall wedding myths so your style possibilities will be as excellent as the weather forecast.
Myth #1: You Must Stick To a “Fall Foliage” Wedding Color Scheme
Experts agree that you do not have to use leaf-hues for a fall wedding, and that some couples tend to rely too heavily on these and other earth tones (like chocolate brown) in autumn. We’re not suggesting that you ignore the season entirely and use bright, summery colors or spring pastels; simply consider other rich and glamorous hues that fit the time of year. Try plum combined with shades of cream and blush, or classic navy blue paired with a glam shade of gold. If you have your heart set on brown, try mocha or cappuccino hues rather than chocolate, which combine beautifully with black, cream, and even red.
In fact, you can use any color you crave — even electric bights or baby pastels — as long as you combine it with a darker hue to create balance. Some examples we love: Tiffany blue with mocha, and hot pink with charcoal gray. And if you want to use some classic fall hues, highlight them with fresh, unexpected tints like burnt orange and deep gold spiked with mango or fuchsia.
Myth #2: The Bridesmaids Must Wear Heavy Silk or Satin
You shouldn’t feel obligated to outfit your maids in heavy fabric just because of the season. Lightweight fabrics like silk will look perfectly appropriate. It’s more important to choose a fabric that flatters everyone’s figures and a color that will complement their complexions (keep in mind that they may be paler in the fall).
For a glamorous fall bridesmaid look, try pale gold dresses accented with sashes or flowers in mango or fuchsia. Rust and deep (but not quite forest) green are also widely flattering shades that look chic at this time of year.
Myth #3: The Guys Have To Wear Dark Suits or Black Tie
Though seersucker may not be the best idea, the groom and his wedding party aren’t obligated to go with a formal, dark suit look. Light khaki suits have an earthy feel that’s still appropriate in the fall. If it’s warm enough, skip the jackets and go for a casual-but-polished look with crisp button-down shirts and khaki slacks.
Myth #4: You Must Incorporate Pumpkins
Though you might want to use them as filling for a ravioli starter, you don’t have to incorporate pumpkins into your wedding aesthetics. There are lots of other décor elements you can work into your wedding that reflect the season in more subtle ways. Since it’s the harvest season, any grains like wheat and millet add atmosphere. Wine or champagne grapes and fruit like apples, pears, and pomegranates will also highlight the fall in a pumpkin-free way.
Myth #5: You Have To Hold the Festivities Indoors
If you’ve always dreamt of an outdoor wedding, but believe you can’t reconcile that dream with your fall wedding date, think again. With enough heat lamps, you can hold the ceremony, cocktail hour, and possibly even the reception outdoors regardless of the temperature; however, you may want to retreat inside for dancing and dessert when the night gets chilly after the sun sets. Give your guests a heads-up (on your wedding website or on a slip of paper inside the invitation) to bring jackets and wraps. If, by chance, it ends up unseasonably cold on your wedding day, arm your bridesmaids with a bunch of inexpensive pashmina-style wraps to pass out to guests who look chilly.
No matter how much you plan to do yourselves or how crafty your friends are, you’ll need professional help to pull off an event of this size and importance. Your vendors will be responsible for bringing your wedding visions to life; choosing a team you’re comfortable working with will make the next several months a lot less stressful.
Finding your wedding pros
If you’re hiring a planner, they will definitely be able to connect you with their favorite trusted vendors, but even so, you still want to do your own research and make an informed decision about the people who will be arranging your centerpieces, decorating your cake and playing the music. Whether you’re looking for a florist, DJ, stationer or caterer, word of mouth is still the number-one way to get reliable recommendations. Start your search by asking any of your recently married friends or coworkers for suggestions. (Be sure to also ask if they had any negative experiences, so you’ll know whom to avoid!)
Once you’ve compiled a list of potential candidates, visit their websites to get a better feel for the quality and style of their work. Browse through their portfolio of photos, look for any awards or professional distinctions they’ve received and read any testimonials they’ve posted. Of course, vendors are going to leave off negative press. To vet each vendor further, consult your local Better Business Bureau to find out if any consumer complaints have been filed against them.
Interviewing candidates
Now that you’ve got a better idea of interesting vendors, it’s time to get up close and personal by setting up interviews. You should aim to speak with at least three vendors in every category before making your final decision. (When you call to set up the appointment, to save time, you may want to confirm that the vendor is available on your wedding date, as well as ask about their average fees to make sure they fall within your price range.) Since you’ll be working very closely with your vendors over the next several months and trusting them with the key elements of your incredibly special day, it’s essential to do an in-person interview. That way, you can see if your personalities jibe. Each vendor will have plenty of questions to ask you in an effort to determine your direction, but you should come prepared with your own list of questions related to your specific needs (for example: has the vendor ever worked in a barnyard setting? are they familiar with gluten-free recipes?), as well as more general details (will the vendor be there on your wedding day, or do they send a team member?). Before you wrap up, always ask for references (with whom you should actually follow up) and never ever feel pressured to hire anyone on the spot. Even if you fall in love with a particular vendor after the initial interview, stick to the original plan to meet with at least two other candidates (at the very least to reaffirm your decision).
Comparing the competitors
While you don’t want to wait too long (top vendors get booked up to a year or more in advance), give yourself a few days after all your interviews to compare prices, overall impressions and any notes you made about each vendor. Highlight the pros and cons of each and prioritize what’s most important to you. Once you’ve narrowed it down to a short list of potential vendors in each category who suit your budget, taste, personality and timetable, ask them to give you a written proposal outlining the services they’ll provide, the vision they’ve sketched out based on your conversations and a breakdown of the estimated costs to pull it all off. Then sit down and carefully compare the details of potential vendors’ proposals.
Negotiating the contract
When you’ve determined your top picks, you’ll set up a meeting to finalize all the nitty-gritty details and sign a written agreement that spells everything out in easy-to-understand language. While there will be aspects of your wedding that you won’t be able to control (like the weather), contracts are your number-one insurance plan against something going wrong, and they can help ensure you get exactly what you paid for — from the right color of peonies to a limo driver who arrives on time. Contracts are legally binding, so if your vendor fails to do what’s stipulated in yours, you can take them to court to recover your payment. Likewise, if you don’t hold up your end of the deal, they can do the same.
Bottom line: Do not work with any vendor who refuses to provide or sign a contract. Even if you’re working with a friend or a relative, you’ll still want to put together some form of written agreement.
The basic points that should be in all of your vendor contracts include dates and times of services, the names of all parties involved in the agreement, the deposit and final payment amounts (as well as the payment schedule), and the cancellation and refund policies. Vendors ultimately want your business, so it doesn’t hurt to ask (nicely) if they can throw in any perks or reduce their fee if a vendor or detail you love is outside your budget. Keep in mind that they won’t always be able to come down, but in our experience, most wedding vendors will do their best to work with you. Contracts should be as specific as possible, listing particular colors, types, quantities (number of guests to be served, individual flowers to be used in each centerpiece) and even substitutions (for example, if pink peonies aren’t available, then pink garden roses will be used instead). They should also include a day-of emergency contingency plan (if photographer A is unable to shoot the wedding because of an emergency, photographer B will replace them). A detailed description of the services provided and final product you’ve agreed upon should be included as well.
Before you sign on that dotted line, have an expert eye (your detail-oriented aunt, a lawyer friend or, even better, your wedding planner) look over each contract to make sure it’s accurate, clear and complete. If you have questions, go back to the vendor to discuss your concerns and renegotiate the details until both parties are happy. Just make sure to ask for a clean final copy of the contract that has all of the revisions you requested, including any changes that were discussed via phone or email. Once you’re 100 percent comfortable with the terms, you and the vendor should both sign and date two copies (one for each of you) to make your agreement legally binding. File the contracts in a safe place along with any related emails or receipts you can refer back to should any issues arise. And should you need to make changes — and your vendor allows it — after you’ve signed the contract, request an addendum that you and the vendor should both initial.
Locking down your team
Until you both sign that contract and you pay the deposit, vendors aren’t obligated to hold the date of your wedding. Translation: They’re free to book another wedding for that day. In order to seal the deal and ensure a vendor’s services, you’ll likely need to put down a deposit at the time you sign the contract. This is typically about 50 percent of the total bill, but it can vary depending on the vendor or if you negotiate a set amount. Be aware that most deposits are nonrefundable, but again, this is a point you’ll want to settle with the vendor up front. Some are willing to return your deposit for special circumstances like loss of a job, illness or military deployment. Whatever you do, just get all those details written into your contract — and never pay a single dime until that signed contract is in your hand! It’s also a smart idea to pay using a credit card. That way, if the vendor goes out of business, ruins your cake or fails to show up, you may be able to have the charges reversed.
Working with your vendors
Got everyone on board? Congrats! With your team finally assembled, it’s time to get down to the exciting business of planning. As you jump right in, remember that your vendors are there to help you, and they truly want you to be happy. The secret to a successful vendor/bride relationship is honest communication.
The best way to get exactly what you’re envisioning is to show (not just tell) your team what you want. Words like “modern,” “classic” or “elegant” are largely subjective and can be interpreted in many different ways. Don’t expect your vendor to magically re-create something from your imagination when you haven’t given them concrete examples to work from. For visual items, like the flowers, cake or lighting, have pictures you can refer to on hand at all of your appointments. For the DJ or band, make explicit lists of songs you want — and don’t want — played.
Never hesitate to speak your mind if you’re not satisfied with an idea your vendor presents to you. Your feedback — both positive and negative — is an essential tool that will help the vendor get to the root of exactly what you want. We promise, as professionals, they’re used to criticism, changes and nitpicky clients, and they won’t be upset or offended. In fact, they’ll be genuinely grateful for the feedback, and you’ll be happy you gave it when you see the final results.
Comments Off on It Takes a Village to Plan a Wedding